To ensure compatibility, please use Google Chrome or Internet Explorer 10 or higher. Certain features may not work as expected in other browsers.
You may have the option to purchase a subscription. To sign up, click the Sign Up for User Account link on the login page.
The top of the sign-up page will show the subscription rates. After filling out the information on the first page, you will be prompted to securely enter your credit card information.
New accounts may have to be approved before they can be used.
To begin searching, type the name of the person or company in the Party 1 field. If you are searching for an individual, make sure to type their last name first.
By default, the search will look for results in both Party 1 and Party 2 fields. To only search the name in the field it is typed in, uncheck the “Ignore party time when searching for name” box.
You may enter a date range or leave both fields blank to search all records. To see anything recorded up to today, leave the Thru field blank.
You can narrow your search by selecting a document group. Clicking on the dropdown will show you all available groups.
Your search can be narrowed further by selecting the type of document you are looking for. Clicking on the dropdown will show you all the available types.
If you are searching in a county with multiple towns, you can narrow your search by town.
Note: Not all documents are indexed to a town. For example, a deed and mortgage will be indexed to a town but a satisfaction of mortgage is not.
Older documents might not be searchable by town. If you enter a town and you can’t find what you’re looking for, try removing the town from your search.
If you know the exact book and page, instrument number, or case number of the document you are looking for, simply fill in those fields and click Search. No other search criteria is needed.
When you have run a search, the results are displayed in a list. Results can be sorted in various ways by clicking the column headings.
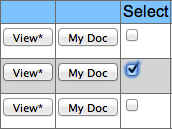
Click the View button next to a desired document to see more information. If images are available, the button will contain an asterisk (*).
Note: Not all documents have an image. Depending on the type of document, the images may be restricted from public viewing, or it’s an older document that hasn’t been digitized. Contact the Clerk’s office for further assistance.
To view a group of documents, select them by clicking the checkbox and click the View Selected button.
On the left side of the screen is the indexing information, along with any related documents. The indexing information can be printed by clicking the Print button on the left side of the screen.
If images are available for the selected document, they will be displayed on the right side of the screen along with controls for moving through pages, printing, downloading, and resizing the image.
Use the dropdown or the double arrow buttons (<< and >>) to move back and forth between documents.

You can also return to the Results page at any time by clicking the link at the top of the page.
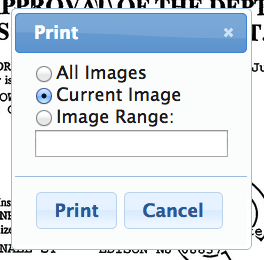
To print, select the Print button above the image. Select whether you would like to print all images, the current image, or a range of images. If you are not a subscriber and the location you are searching in charges per print, you will be prompted to securely enter your credit card information before you can print the image.

If you’d like to save multiple documents to print later, click the My Doc button. Click the My Documents link at the top of the screen to view all saved documents.
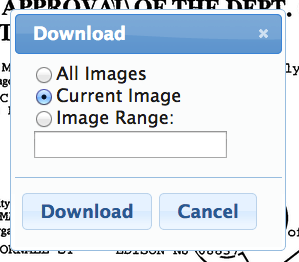
Click the Download button above the image. Select whether you would like to download all images, the current image, or a range of images. If you are not a subscriber and the location you are searching in charges per download, you will be prompted to securely enter your credit card information before you can download the image.

If you’d like to save multiple documents to download later, click the My Doc button. Click the My Documents link at the top of the screen to view all saved documents.
Downloading images is a good way to manipulate them in more advanced ways, using a program such as Adobe Reader or Acrobat.
To view all names that have resulted from your search, click the Names link at the top of the page. From the Names Summary page, you can print a list of names, view all documents associated with a particular name, or add the documents associated with a name to My Docs.
My Documents allows you to store your documents and print them all at once. Click the My Doc button, which appears on both the Results and View pages, to add something to My Documents. To view or print items you’ve placed there, click the My Documents link at the top of the page.
For assistance, contact web support at websupport@iqsworks.com .